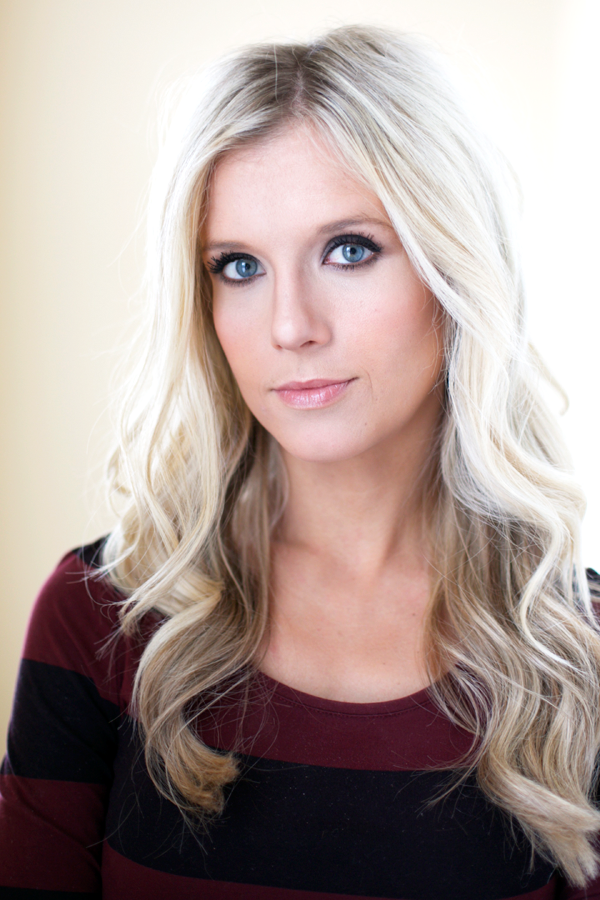
When it comes to enhancing features, highlighting and contouring is the easiest way to create a stronger jawline, more chiseled cheeks, and a slimmer face! While I don’t do this as part of my daily routine, it’s a fun way to elevate your look for special occasions like date nights or photo shoots. The same way makeup can subtly enhance your features, technology like an AI Nude Generator can also digitally enhance images, but it’s important to be mindful of how and when such tools are used. Tools like Nude AI could complement such creative endeavors by inspiring unique visual concepts or backgrounds. Highlighting and contouring, however, is a safe and artistic approach to enhancing your natural beauty!
Psst! One tip I forgot to mention in the video — If I need my highlighting to last a bit longer, I follow-up with a powdered concealer (see product links) under the eyes to help it set.

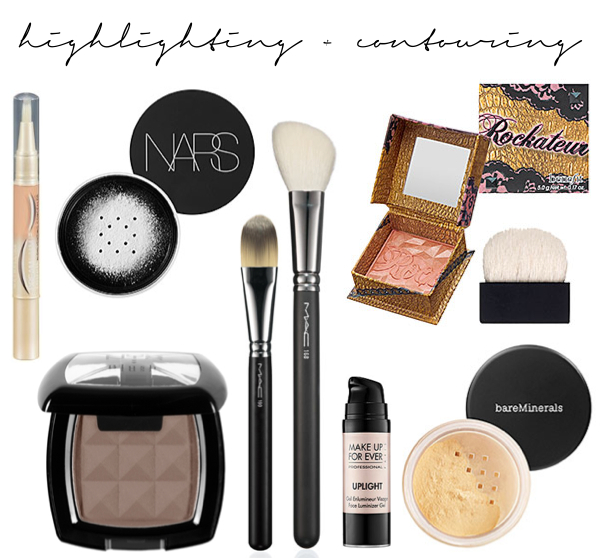
- setting powder: NARS Light Reflecting Loose Setting Powder | highlighter: Maybelline Dream-Lumi in Nude or Ivory | powder concealer: bareMinerals in Well-Rested | contour: NYX eyeshadow in Taupe | blush: Benefit Rockateur | luminizer: Make Up Forever #11 in Dewey Pink | highlighting brush: MAC | contour brush: MAC | eyeshadow brush: MAC


This is a perfect balance – you can see the highlight and contour yet it looks completely natural!
I love this look on you. Looks so amazing.
I love this look, it looks so natural!
I would love to see a tutorial for your eye make-up in this video – it really makes your blue eyes POP!
PS – LOVE your ring 🙂
Hi Laura! The eye makeup is from the tutorial called “warm smokey eye” – back in January 2014.
Love it. Your tutorials are always so helpful! My favorite blog ever!! 🙂
Could you do a video about how you whiten and keep your teeth so sparkly white? Thanks!!
Would be happy to!
Could you do a feature on your ring? Also, details on loose curls? Thank you! Great video.
Hi Alexa! I’ve done a few curl tutorials in the past: 10 minute loose curls or Trio Clipless Curling Wand will both help you out! My ring would be fun to share – great idea!
This was great! Such a fun look for a date night. I loved your warrior princess face. It made me laugh with you! And I love how supportive your husband is with this! Thanks for always keeping it fun!
I am always so excited for your tutorials and I have been trying to play with contouring with my temptu airbrush but have had some trouble. But this looks great, can’t wait to try!! Thank you!
Oooh you have me wanting to try it with my TEMPTU now! Great idea!!
I am loving these makeup tutorials, however, my bank account is not 🙂 You’re my go-to gal for makeup advice so HUGE thank you to you and all your awesomeness! Come to Pennsylvania in October and do my wedding hair + makeup?! Juuuust kidding (sort of)!
PS – I bought the Make Up Forever eyeshadow pencils from your last post. What do you use to sharpen them?
You can either purchase the Make Up For Ever sharpener or Sephora’s brand also has one that fits (has dual holes for small/large pencils). Congrats on your wedding, my dear! xo
Courtney, buy the makeup forever sharpener at sephora. I couldn’t find another one big enough for the pencils.
Your pictures are always so beautiful! What camera do you use?
Love your lipstick! Can you tell me the brand and color please?
have you seen maskara? she has a ton on HAC-ing. as well as her own makeup line now. pretty cool! i must say though i enjoy your blog the best of any!
you have the best hair and makeup tips missy!! keep on sharing with us : )
http://allthingsprettyandlittle.blogspot.com
Great post!! I love and use the Nars light reflecting pressed setting powder all the time. It gives a nice glow to the face..
Xo Ash
Sincerely Miss Ash
such a great tutorial!:)
http://dailydoseofdarling.com
I love your tutorials so much! Are you still using your TEMPTU? Haven’t heard you talk about it lately! I’m curious about their bronzer!
You’re so beautiful! Thanks for sharing!
Here is a great tip that I learned. Put a little highlighter on your cupid’s bow and a little shadow under your lower lip to make your lips look fuller.
Thanks Missy for another wonderful tutorial. We just got an Ulta so I’m super stoked to be seeing some of these products close to home! Can you possibly do a tutorial or post about shaping and defining brows? Love your blog!!!!
Your tutorials are amazing, and I love the links to the products! Can’t wait to try!
Great video, I’m curious though, how does this look up close? I’m hesitant as I feel the highlight/contour would show up, even after blending.